How to Use a White-Balance Card for Taking Underwater Videos
Color in underwater video helps dictate the mood, creative aesthetic, and overall impact of the footage. This is particularly important on social media, where you may have less than a second to hook the viewer.
This color needs to be captured correctly in-camera, since most recorded video is captured in a compressed format that leaves little room for adjustment during post-processing. Ideally you can use filters and camera settings to bring red and other colors back into the scene while removing the blue/green color cast.
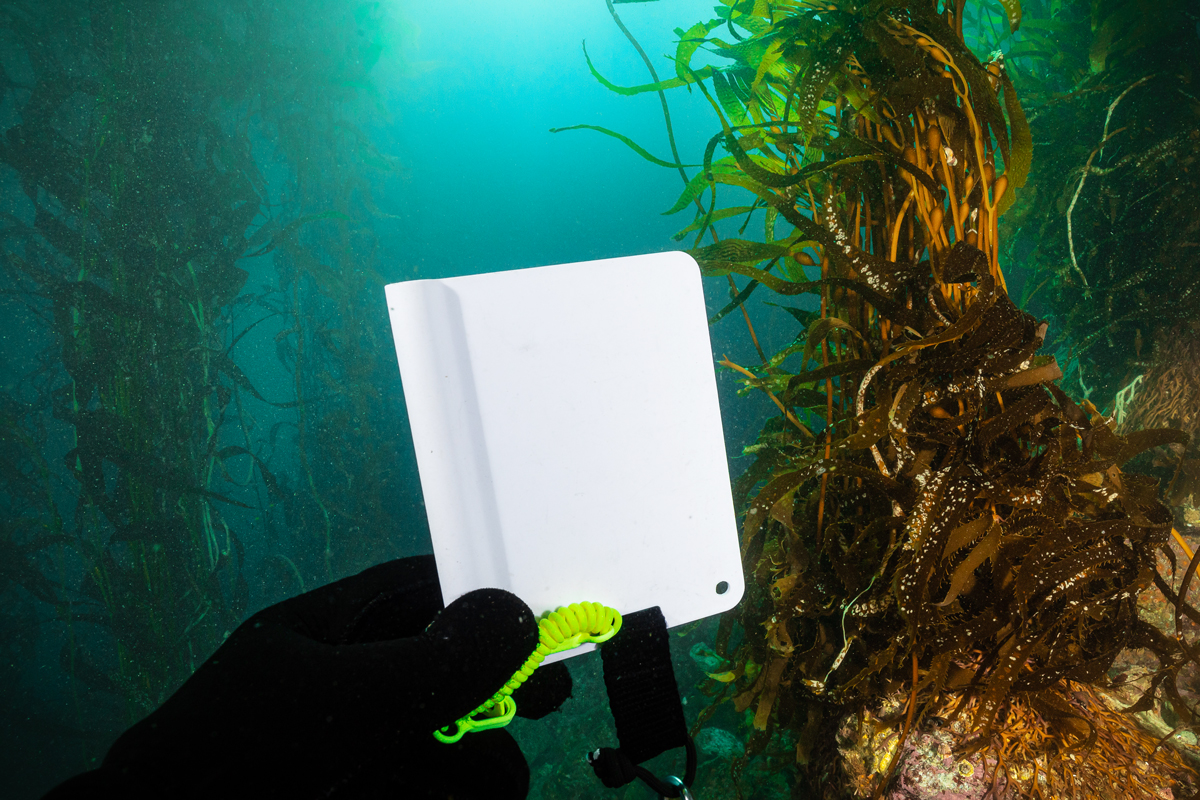
Red filters are popular with smaller cameras, but most divers using larger systems tend to rely on manual white-bal- ance settings. Smaller cameras often have underwater scene modes or a manual color-temperature adjustment to set white balance. Larger cameras require use of a white-balance card to create a custom white balance for the scene. Using a white-balance card varies by camera, but generally you should first make set your exposure settings and lighting for the scene. Next, hold the white-balance card in front of the camera so it fills a significant portion of the frame and take a still photo. In your manual white balance setting, select custom white balance. The camera will ask to use the photo you just took as a white point reference. Click OK. Finally, exit the menu and you will see the updated picture in your LCD screen.
Pro Tip: If the color doesn’t look quite right, try shooting the white-balance card again and going through the custom white-balance process with the new ref- erence image.
When you subscribe to the blog, we will send you an e-mail when there are new updates on the site so you wouldn't miss them.